So, I gotta come clean. I can’t claim that this is the actual way that engineers at Skywalker Sound processed Adam Driver’s voice to create the voice of Kylo Ren. This is not some secret insight scoop. This is but my humble attempt of dissecting what I know about the character and what my ears pickup. Is it 100% accurate? Probably not. Is it close enough that you could make it work/learn something from it? I like to think so.
Understand the Process, You Must
I’m a big fan of trying to get in the head of the people that make these kinds of decisions. I think that once you understand why they do the things they do, you can use the thought process (and not just copy the parameters) to craft sensitive and more specific sound design for new projects. It takes time and a keen ear to get the exact results you want, and even then it’s pretty much impossible to replicate everything. From the signal chain, the plugins they may have used, and of course, the actual performance, there’s a lot of variables. With that being said, more often than not it doesn’t have to be perfect, just close enough so as to get the effect across. In this exercise, however, my goal was to get as close as I could, and these are the results that I got.
So you want to be a Sith?
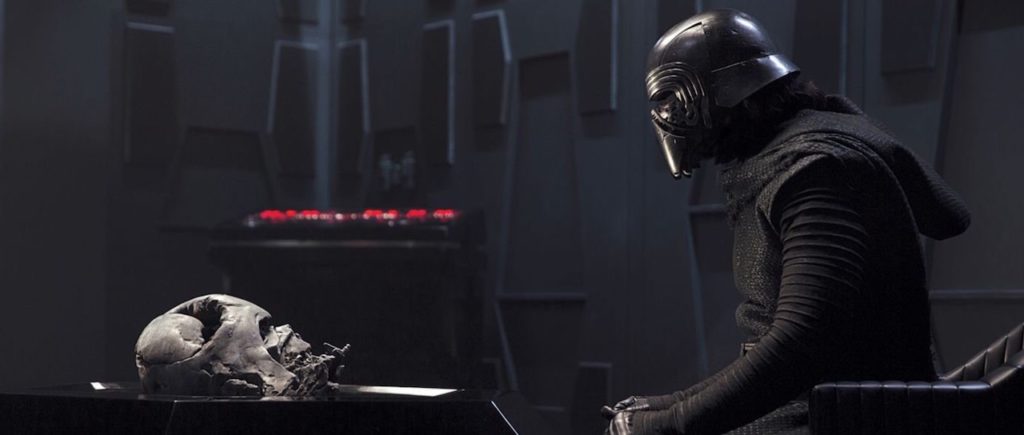
Kylo Ren is one of my favorite Star Wars villains. He’s unlike any other before in the series. His constant attempts to veer towards the dark side and keep the light from reaching him means keeping himself in a constant state of rage and imbalance. We see this visually with his lightsaber, the infamous red cross that looks as unstable as Kylo acts. But one of my favorite things about him is the voice box he installed in his helmet, and how the sound designers for Star Wars were careful to make it different from everyone’s favorite space bad guy.
The Timeless Rasps of Darth Vader
Vader’s voice is one the most iconic in cinema history. It’s also serves a purpose: Darth Vader is crippled to the point where his humanity is almost lost. As a result, his voice is not only a way to make his enemies fear him (as if his mask and height weren’t enough), but its also a by-product of the respirator he uses to keep himself alive. For this, Ben Burtt (Star Wars’ Sound Designer) used an actual scuba diver’s respirator to get a tubular and robotic sound, as well as the infamous breathing sound that I’m sure is now echoing in your head.
The Not-Quite-Vader Sounds of Kylo Ren
This is where it gets interesting. Kylo Ren is NOT a robot. He’s a human, a boy, playing dress up as Darth Vader. This is important because Ren doesn’t NEED the mask to survive. He’s literally cosplaying as his grandpa in his efforts to become him. The way his voice box changes his timbre isn’t necessary; and more importantly it’s also a lot different from Vader’s, in a the same way that Kylo himself is different from his ancestor.
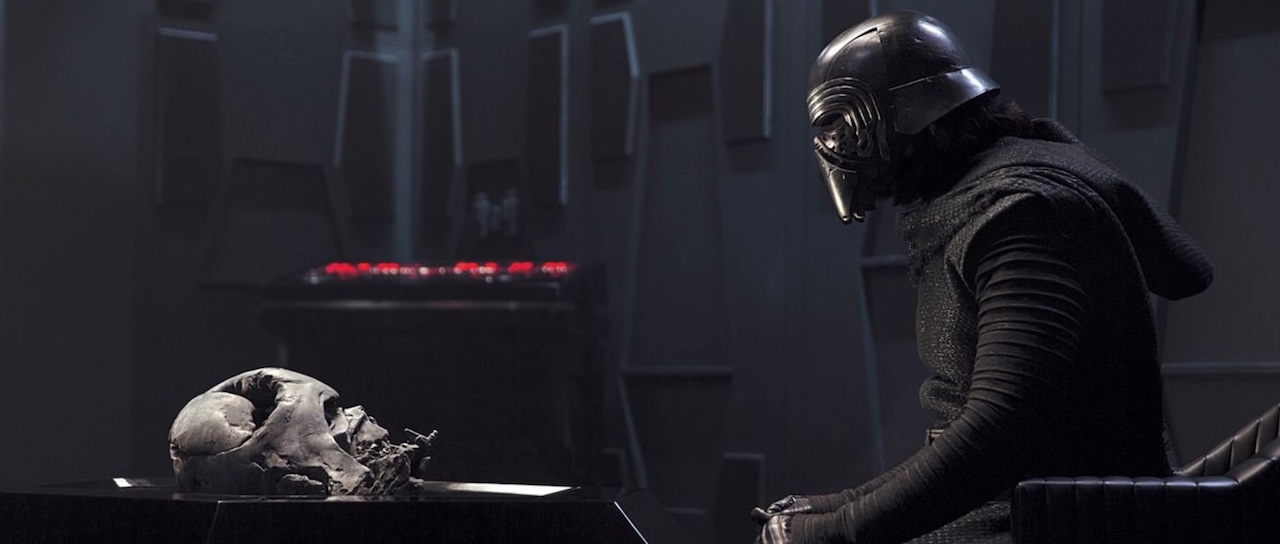
Vader always had a calm, imposing demeanor, while Ren’s is anything but. He’s impatient, violent, and very intense. In this article, you can read on how JJ Abrams wanted Kylo’s character to be scary, “think chainsaws, flamethrowers,” and other fun stuff like that. His breathing sounds a lot more punchy and edgy, so compressed it always sounds like he’s seconds away from blowing up. It’s the aural equal to his unstable and intense-sounding lightsaber. It’s the details that make anything feel real and I think that the way they approached the sound design for Kylo Ren was fantastic.

Now, before we begin, here’s the original VO I used to try to replicate the effect.
The real unstable genius
First of all, Adam Driver’s voice is pitched down and formant shifted. This is a very important detail. For instance, while most other imperial headgear in the series has a “military comms” sound to them (see Stormtroopers), they don’t change the pitch of their voices. This immediately changes Driver’s timbre–which tends to be a lot more mellow than your average bad guy–to a more imposing and deep tone, like a villain should sound.
For this I used the Waves UltraPitch Shift, which is one of my favorite pitch manipulating plugins simply because it lets you adjust the formants, something that Pro Tools won’t let you do natively (another reason to try Ableton Live for sound design if you haven’t). The interface also made it really easy. I just went back and forth with the reference and played with the settings until I got close to the level of shift in Driver’s voice. If this was Adam Driver the setting might’ve been different, so it’s about comparing the two to get the result you want.
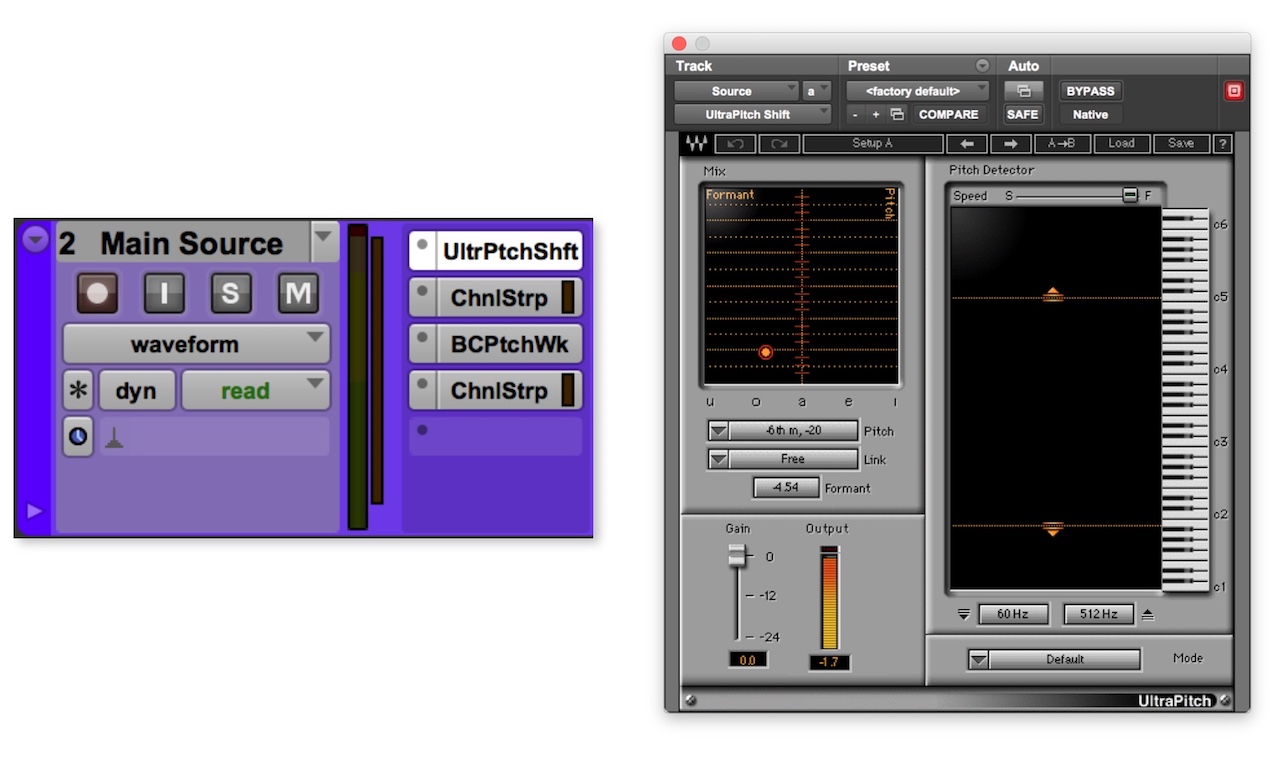
I’m gonna go on to say that this might be the most important step of the whole process. After this part of the signal chain, most of everything else is decoration. This crucial step is what comprises most of the effect. Try playing with different pitch shifting plugins and see what you can come up with!
Taking a Dip Into Equalizing
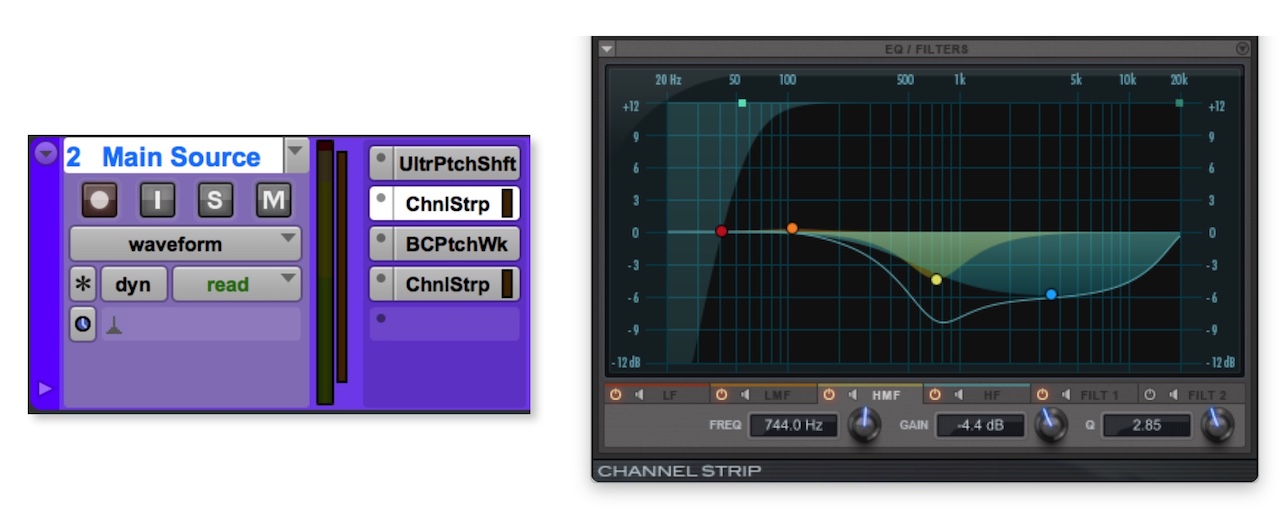
Another important part of this chain is the EQ that comes up after that. I noticed that Driver’s voice sounds a lot more muffled than it would with just the pitch shift, almost as if he’s doing everything he can to be as unrecognizable as possible. A simple but generous dip on almost everything above 500 Hz seemed to do the trick.
Compression Crushing, Like a Force Grip
Ren’s voice is super compressed, but it’s also punchy and deep. It sounds like he’s on the phone with you, but also punching you through it. We need to make the source aggressive and possibly get some natural harmonics from the compressor. This might throw some people off, but my tool of choice is the Camel Crusher. It can, however, be easily achieved with any half decent “crushing compressor,” as I like to call them. Other options include iZotope Trash 2, Sound Toy’s Decapitator, the list goes on. If you don’t have any, try playing with the BF-76 and see how much you can push it.
I just happen to make electronic music so I’m a huge fan of the Camel Crusher. It’s a free VST plugin that has some of the nicest-sounding heavy compression, filtering and tube emulation you can find. Since it’s a VST and AU-only plugin, though, I had to use BlueCat’s Patchwork to throw it into my Pro Tools signal chain. Another cool thing about Patchworks is that it allows you to create entire signal chains within one plugin slot. I used this technique to create two instances of the Camel Crusher, each running different settings. I just played around with it until I got to the ‘in your face’ feel that I was looking for.
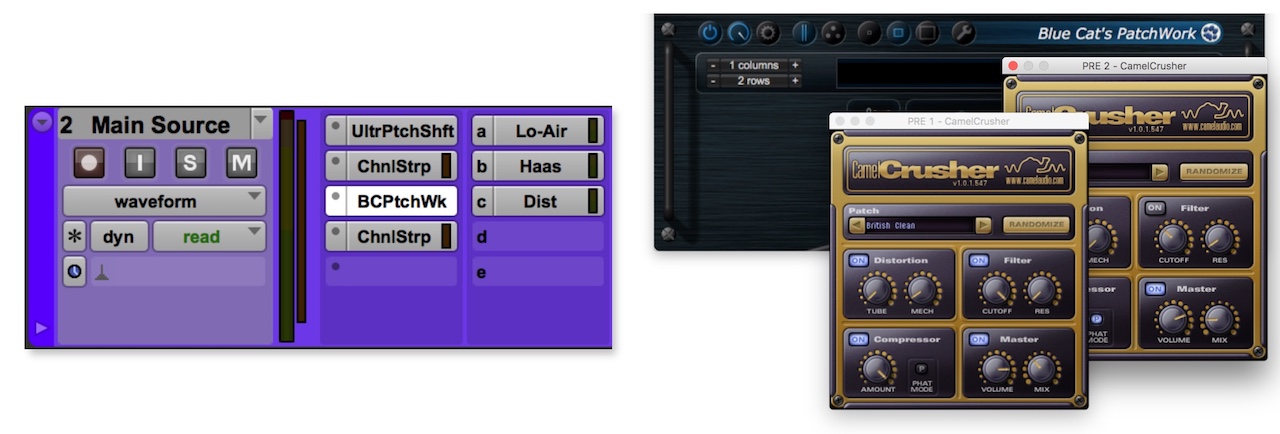
Important side note: keep an eye on the mix knobs for each plugin. Compression brings out the voice to a point where it feels like it’s jumping at you, which is awesome. However, it’s easy to get carried away and lose a lot of the body and low end. My setting are pretty extreme but they’re blended to the original with taste. Just remember: a little can go a long way!
Channel the Dark Side: Go Against Your Teachings
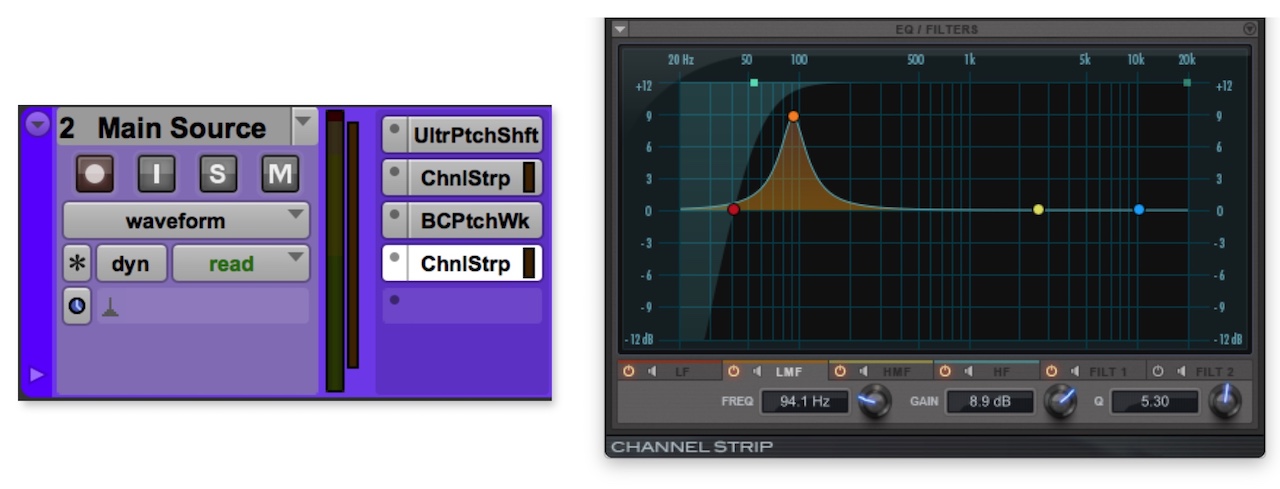
Now I’m about to throw that last advice out the window. In audio, sometimes you need to do things that we’ve been taught are “wrong” to achieve the results we want. At this point the voice is punchy enough but I feel like it needs a little more bottom end. And a good ol’ 9db boost at 100Hz is just what it needed. As I’ve said, a little can go a long way; but don’t be afraid to push your tools to see what results you can get. It’s better to overdo it and then push it back until it’s sits nice than creating a weak mix to start.
Parallel Chains
So now we have something that sounds punchy and aggressive, a great starting point but we’re not there yet. While so far we have a very present and intense voice, it still sounds more like intense Joe Rogan than a space dictator. This is where parallel chains come in, to add all of the details that make it more accurate.
Distorting with Sans-Amp
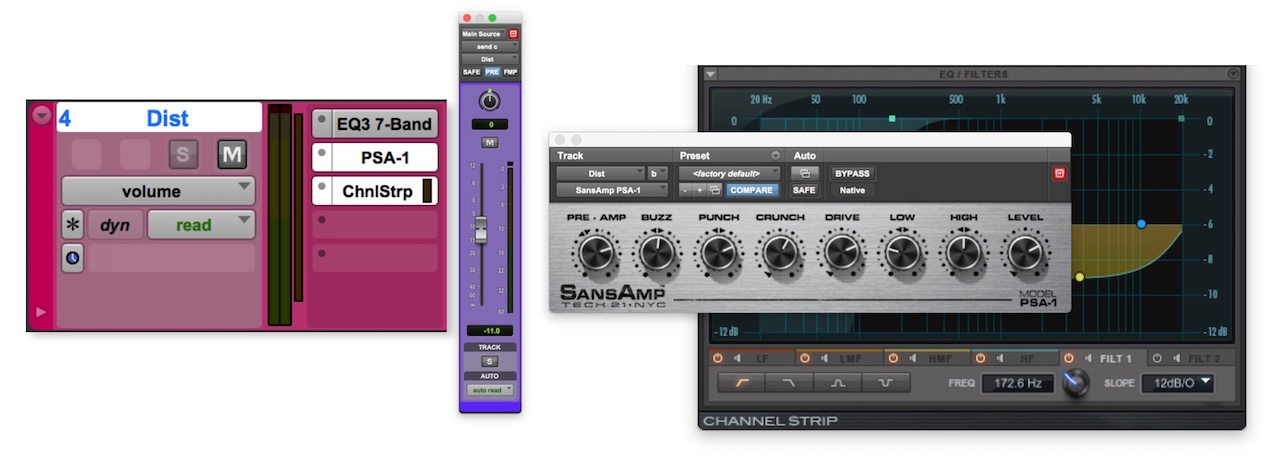
Starting off, distortion. There’s still a lot of that “radio comms” sound in his voice, just more aggressive than other characters. To achieve that grit and bite, I made a parallel chain with Pro Tools’ own Sans-Amp. It’s my favorite plugin when I need a some edgy and sharp distortion. This is a Pre-Fader Send, which means that the signal is gonna go to the buss before hitting the main chain. Ultimately, this gives me much more control over the blend I’m creating. Since this bus is also a main component in the body of the voice, I left the low end alone. However, I did do a dip similar to the muffling EQ above to make sure I’m not making the voice brighter than I want it.
Slow Down There Haas (Delay)
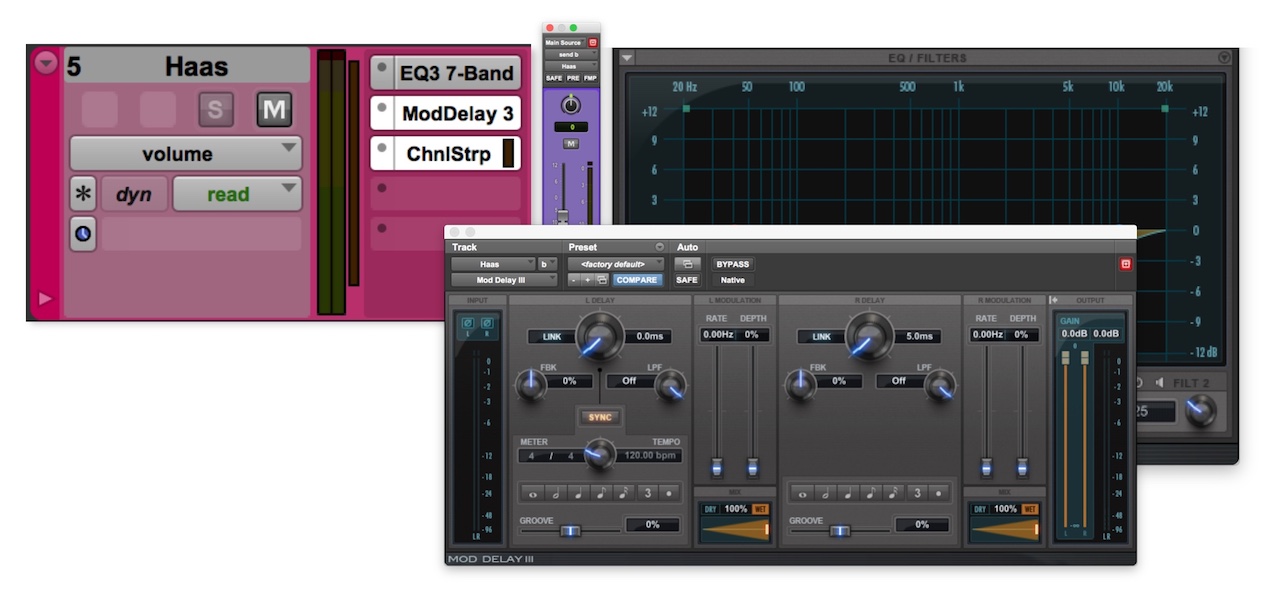
Second, the Haas Delay. I threw this one in to give it more of a robotic/tubular texture. It’s subtle, and you’ll notice that it’s almost too little of a change to hear with the compressor on the main buss turned off. A lot of tutorials on this same topic have this as one of the main components of the final sound. I think that they’re mistaken.
Sure, a Haas Delay is cool, I can’t deny that. For those of you who don’t know, you create Haas Delay by moving one side of a sound source a couple of milliseconds apart. The result sounds like two different takes running almost simultaneously. It’s a pretty common effect for creating robot voices, and it’s creates a chorus effect is that we’ve come to expect from machines and metallic voices.
Ren’s voice box, however, is really centered and aggressive, as opposed to calm and wide, like Vader’s. So a subtle touch goes a long way with his mix.
Making Magic With Lo-Air
Finally, and probably one of my favorite things to do, Lo-Air. This step is super optional, but it can work wonders. After listening to some examples, I started catching some sub-harmonic synthesis going on below Ren’s voice. Keep in mind: since this is a movie, the voice of the character needs to sound as realistic as possible. As a result, in some situations (ie when he’s further away) a lot of the low end goes away.
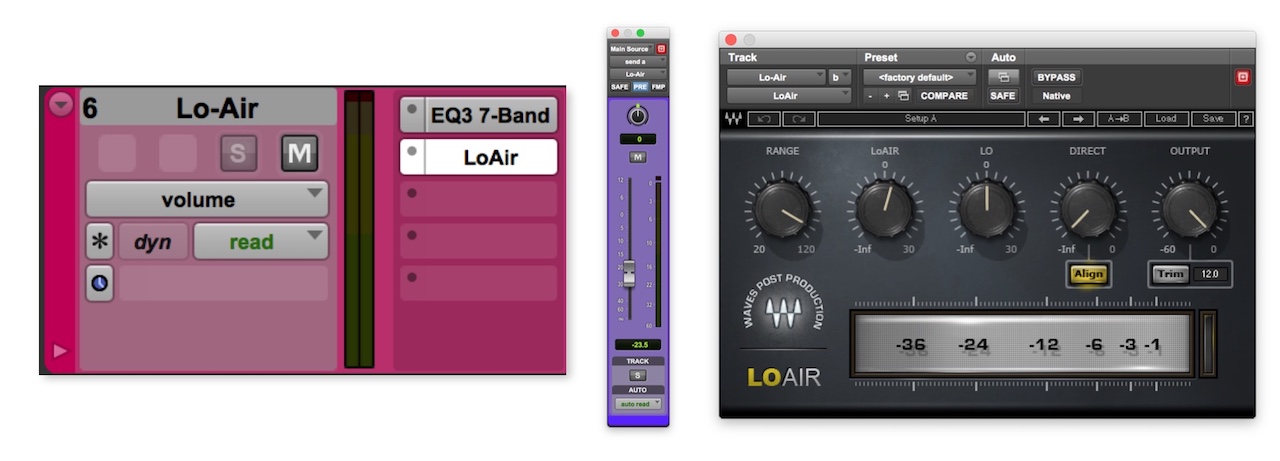
Back to Lo-Air, also by Waves. It’s a subharmonic synth, and it does exactly what you’d expect it to. You run audio through it, pick a fundamental frequency (this depends on the tone of voice, I recommend just sweeping on that knob until you find it), and it creates an undertone (as opposed to an overtone) that follows the sound. It’s not perfect, and it’s possible a vocoder or something like iZotope’s Vocal Synth 2 might be better for this application. But I’m a big fan, and I love putting this on voices and sound effects. It gives an explosion that extra movie THUMP that you really want your audience to feel. This one is also a Pre-Fader send, so that it acts on a clean signal as opposed to the distorted, compressed main one.
And to tie it all together
After all of that work, the resulting sound has all the elements we’re looking for. Yet, it still feels a little loose. After all, this voice is going out of a voice box, so everything needs to sound like it’s coming from one place.
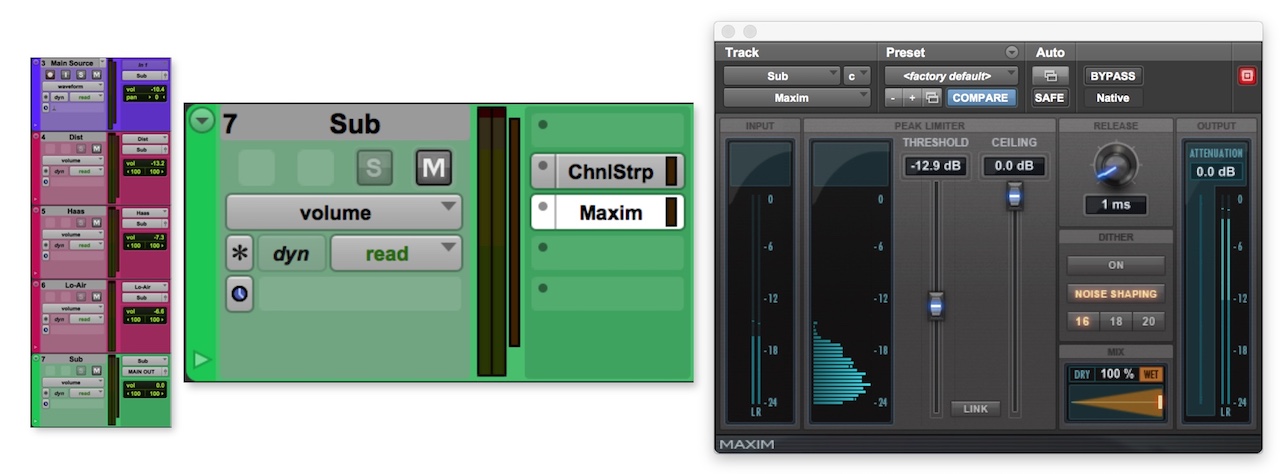
For this kind of scenario, I like to buss all of my sources and parallel chains to a sum buss with some sort of limiter or hard compressor. This step requires something that really mashes all of the different elements together in a way that unifies the sound without detracting from all the work we’ve put in. For this, I just used Maxim, one of my all time favorite limiters that’s conveniently Pro Tools native. That said, really any hard brick limiter should do. I pulled the threshold down until I heard everything blend really well. Then, I pushed a little past that, just to see what would happen. And finally, I pulled it back to where it sits nice and uniform.
Without Limiter
With Limiter
Complete Kylo Ren Demo
So that’s how I managed to copy Ren’s voice from Star Wars. Any tips, comments or questions? Let me know below. Stay tuned for the next one!
